
Last Updated on May 5, 2022 by Gary Stephen
Cannabis is not as easy to grow as you might think. It requires proper regulation of its environment to produce good quality buds. Thorough care and attention are crucial, especially during the plant’s infancy stage. However, not all propagation kit will fit your needs. There are many factors to consider to identify which kit will work for your weed growing. But not to fear, we’ve done all the research for you!
There are two basic ways to propagate marijuana. Firstly, it can be done through seed germination or, secondly, through cloning. Although challenging to grow, modern innovations have made weed growing more convenient for growers. Through the use of propagation kits, cannabis reproduction is made simpler.
In this article, we will share with you the important things you need to know about propagation kits. We will also discuss how to determine which one to buy. Moreover, we will also take the liberty to present some of the best growing kits available on the market. So sit back, relax and see how you can make your job of growing weed easy as 1, 2, 3. Let’s jump right in!
[amazon box=”B06ZY5SWRX,B01BOY6Y2I,B07R9S38VX,B071CYJQYT,B000I63VSE,B01HGME97E,B06ZY5SWRX,B07XNQT52F,B00AKKU71M,B07GRRDXSV” template=”table”]
Cannabis Propagation Through Seed Germination
Germination is the process of growing a new cultivar straight from the seed. It is also known as “seed popping”. There are several ways to do this. Here are some of the most common and effective ways:
Method #1: Direct in soil
Planting your seeds in soil is the most natural and effective way of germination. The soil medium gives the roots ample support and protection. Thus, lessening the risk of interrupting its growth process.
When using this method, the first thing you have to check is the appropriateness of the soil. Having the right type ensures to provide a conducive growth environment. Choose a soil that has a pH level of 6.
In this case, a seed starter or potting soil is more ideal to use. Note though that this type is often mildly-fertilized already. So, avoid giving additional nutrient solutions for the first two weeks. This prevents the risk of damaging the seeds from a nutrient overdose.
Here’s a step-by-step guide on how to germinate seeds in the soil.
Put your soil in small pots.
- Create a small hole with a depth of about 1.5 centimeters.
- Place the cannabis seed inside the hole.
- Or, if the seeds have already begun to germinate, place the roots facing downward.
- Cover the hole with loose soil.
- Make sure not to push down to prevent disturbing the fragile roots.
- Moisten the soil with water using a sprayer for even distribution.
- Place the pot under a grow light to maintain a conducive temperature of 22°C or 72°F.
- Continue to supervise the soil to ensure it stays moist.
- After a week, stems should have been able to develop already.
- Once it reaches a length between 5 to 10 centimeters, you may now transplant your cultivar to a larger pot.


Method #2: Soaking in water
Too much liquid is often against the basic principles of growing cannabis. Thus, soaking your seeds in water may sound like an odd idea. Then again, many growers swear by the effectiveness of this method.
The trick here is to not let the seeds soak for too long. Usually, the seeds start to grow visible tails within 24 to 48 hours. But, you can leave it in water for up to 7 days max.
This method is effective because the seeds become well-hydrated to kickstart germination. If done right, the submersion helps to soften and break down the shell. Thus, shortening the pre-sprouting process.
Here’s a step-by-step guide on how to germinate seeds in the water.
- Fill the glass with tap water.
- Let it sit until it reaches room temperature or around 18°C or 65°F.
- You may drop 2 to 3 seeds per container.
- Refill the water every other day.
- After 2 to 4 days, the seeds should have already split and started to develop roots.
- Once the roots reach 3 to 5 millimeters in length, you can now plant them in soil with roots facing down.
Although this method is a favorite among many growers, do take note though that it is a sensitive process too. A sprouting seed is very fragile. Thus, you have to be extra careful when handling them. The slightest pressure can stress your seeds and halt their development in effect.
Method #3: With cotton pads or paper towels
Using cotton pads is another common method of germinating cannabis seeds. It is inexpensive and effective in maintaining the seed’s moisture.
In the same fashion, you can also use paper towels for this process. Make sure though that this is plain and non-porous. The cloth-type version is not suitable for this as it may cause the roots to develop between the woven layers.
Here’s a step-by-step guide on how to germinate seeds in cotton pads or paper towels.
- Place a few seeds between two cotton pads and moist it with water.
- If using paper towels, place the seeds between two sheets and moisten with water.
- Place the paper towel-cushioned seeds between two plates to prevent moisture from evaporating.
- Store the seeds under an ideal temperature of 22°C or 72°F.
- After 2 to 5 days, the seeds should have already split and started to develop roots.
- Once the roots reach 3 to 5 millimeters in length, you can now plant them in soil with roots facing down.


Cannabis Propagation Through Cloning
Cloning from cuttings is another way to propagate cannabis plants. It is also known as asexual reproduction. It is being called so because you do not need a seed to reproduce. Instead, a cutting is being taken from a mother plant to cultivate a new plant called a clone.
Both of these plants will share the same genes. Thus, whatever the characteristics of the mother, the clone will inherit it too. This includes the flavor, yield, grow time, and cannabinoid profile among many others.
In simple terms, the process is about making a smaller copy of a specific cultivar. In this circumstance, it is ideal to look for a mother plant candidate with a very good phenotype.
Often, growers prefer this propagation method as compared to others. That is because cloning eliminates the intensive process of seed germination. Thus, sparing you the effort, time, and money.
Here’s how to clone a cannabis plant through cutting.
Step #1: Select your mother plant
This is this first and crucial step in cloning. The outcome of your cultivar is dependent on the quality of the mother plant you took your cutting from. So, it is a must to be meticulous during the selection phase. It’s not enough that it is your favorite strain or variety. You have to consider these following characteristics too:
- The plant is grown from seeds.
- At least two months old.
- Strong and healthy.
- Has rapid growth.
- Produces great yield.
- With large roots.
- Has strong buds.
It is possible to clone both indoor and outdoor strains of cannabis. But it would be easier to grow them if you replicate its intended environment. Like, using the indoor strain for indoor use and the outdoor strain for outdoors.
Moreover, it is also important to choose a mature plant as your mother plant. It should have been in the vegetative stage for at least 2 to 3 months old already. By this period, the cultivar is mature enough to root.
Step #2: Prepare your mother plant
After determining which mother plant to use, it is a must to condition them first before cutting. Proper preparation is very important. This extra step will ensure that your cuttings will have a higher success rate to root.

To prep, reduce the nitrogen intake of the plant by 10% lesser than normal. Do this at least one to two weeks before you intend to cut off its branches.
Step #3: Cutting off the stems
After you have well-prepped your mother plant, you may now start clipping the stems. But note though that there are also considerations in choosing which branches to cut.
First, you have to choose a stem with larger leaves. That is because bigger leaves tend to encourage faster rooting. Moreover, you have to ensure that you cut the branch long enough. A length of about 6 to 8 inches will be fine. On this cutting, make sure you have at least one pair of leaves. In that way, you will have two branches that will likely sprout.
The proper technique of cutting is also important to observe. Instead of clipping the stem straight, it is rather best to cut them at an angle. In this manner, you provide a larger surface for water absorption. Thus, giving your branch a better advantage for hydration.
It is also essential to use the right cutting tools. Your garden shears or pruner should be well


-sharpened before using it. Cutting with dull scissors will likely crush your stem. As a consequence, it becomes harder for it to form roots.
Also, do not forget to always sterilize your instruments with 70% alcohol. No need to soak in the solution, simple wiping will do. Do this every after usage to prevent cross-contamination of plant diseases.
Step #4: Rooting of the stem
There are a lot of ways to help your cutting develop its roots. One of which is through the use of rooting solutions. This product may either come in the form of powder, gel, or liquid.


Regardless of its type, ensure the preparation of your solution is sterile. Consider any tears in the seal as unsafe. Thus, inspect the packaging before using it. Likewise, there should be proper storage too of the excess product. It must be tightly-sealed and stored in a cool dry place. This will help to keep the solution intact for the next use.

The application of this product is very easy. Start by moistening the tip of your cutting. Then, dip the base into the powder, gel, or liquid rooting solution. Shake off the excess. Be as gentle as possible.
Different Methods of Cloning Cannabis Plants
After you have prepped and clipped your cuttings from the mother plant, you are now ready for cloning. Same with seed germination, there are also different ways to make clones.
Method #1: Potting in soil
This is the most common and simplest way to clone cannabis. To prep the cutting, you need to trim the mature leaves in the branch. Doing this helps to further promote growth. Moreover, you should saturate the potting soil first before using it. This helps to keep the soil intact when you plant the cuttings.

Here’s a step-by-step guide on how to clone cannabis using potting soil.
- Saturate the potting soil with water.
- Cut the stem at an angle.
- Dip the tip in the rooting solution.
- Plant the cutting in the saturated potting soil.
- Distribute the soil on the top layer.
- Mist the plant and soil enough to moisten it.
- Put it inside the propagator.
- Spray the inside of the propagator dome with water before covering.
- Put the propagator under the CFL light.
Method #2: Cloning in rockwool
In this method, you will be using rockwool cubes as your media. Before putting in your cuttings, ensure that you have prepped the cubes first. That is because rockwool pH by nature is quite unstable. Thus, it can pretty much mess with your plant’s pH level if you use it without proper preparation.

Preparing rockwool is very easy. All you have to do is to rinse it first with clean water. Once done, soak it in a 5.5 pH water solution for a few hours or so. Then, it’s ready for use.
The suitable temperature when using a rockwool cube should be between 72°F to 75°F and a humidity of 90%. With the right environment, expect the roots to start growing within 8 to 12 days.
Here’s a step-by-step guide on how to clone cannabis using rockwool cubes.
- Prepare the rockwool cube by rinsing and soaking in water.
- Cut the clone in an angle.
- Dip the tip of the clone in a rooting solution.
- Place the dipped clone in the prepped rockwool cube.
- Store it in a propagator.
- Set the right temperature and humidity levels.
Method #3: Cloning in water
Among the soilless methods, cloning in water is the most common. There are a few important things to keep in mind though when using this method.
First, it is advisable to use amber or any dark-colored container. The tint helps to block the light from penetrating the container. Thus, preventing algae from growing inside. Also, agitate the water once in a while to further halt its formation. If it still does, go ahead and change the water.
Moreover, try to look for at least a 16-ounce container with a narrow mouth. The smaller opening helps the plant to maintain a more upright position.
It is also important to keep the plant away from direct sunlight not until new leaves start to grow on top. New leaves grow at about the same time as the roots often between 5 to 10 days. You can tell if the cultivar is ready for transplant once both are already well-developed.
Here’s a step-by-step guide on how to clone cannabis using water.
- Trim off the mature leaves from the stem.
- Regulate the water to reach a pH level of 5.8.
- Cover the top of the container.
- Poke a small hole in the middle of the cover.
- Dip the tip of the cutting in the rooting solution.
- Put the dipped cutting in the container with water.
- Change the water as needed.
Top 10 Best Cannabis Plant Propagator Kits
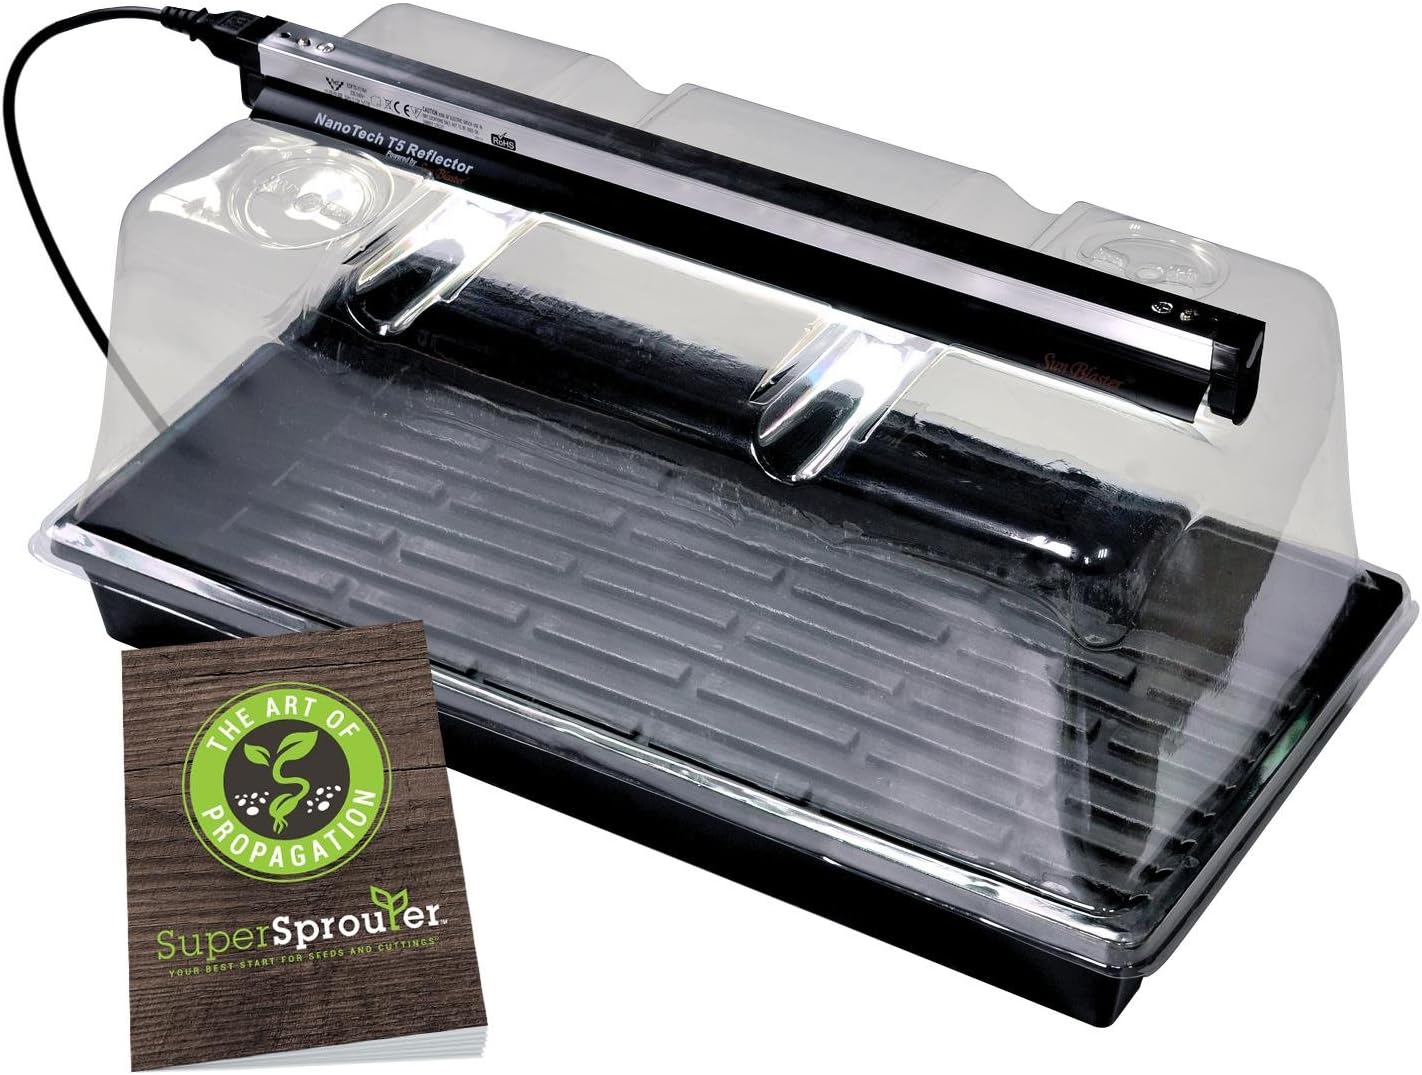
1. Editor’s Pick – Super Sprouter Premium Propagation Kit
[su_button url=”https://www.amazon.com/dp/B06ZY5SWRX?tag=mygardenpl-20″ target=”blank” background=”#99CC33″ size=”6″ center=”yes” icon=”icon: hand-o-right” icon_color=”#FFFFF” rel=”nofollow”]Buy This Product Here[/su_button]
This is the ultimate complete starter system for your seedlings and cuttings. The kit includes everything you need to produce a conducive environment for propagation.
The set comes with an ultra-clear 7-inch vented dome with built-in light track channels. This also comes with a T5 grow light to fit in the channeled dome.
It has a thick and durable 10×20 grow tray with no holes. Along with it comes an ETL-listed heat mat to help maintain the desired level of warmth inside.
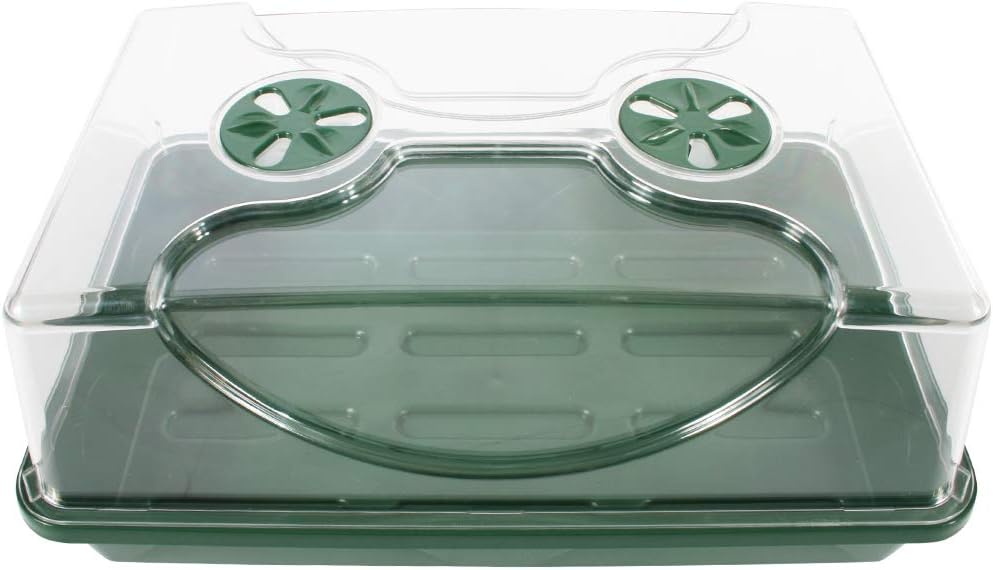
2. Best Basic Propagation Kit – EarlyGrow 70738 Medium Domed Propagator
[su_button url=”https://www.amazon.com/dp/B01BOY6Y2I?tag=mygardenpl-20″ target=”blank” background=”#99CC33″ size=”6″ center=”yes” icon=”icon: hand-o-right” icon_color=”#FFFFF” rel=”nofollow”]Buy This Product Here[/su_button]
This is a basic kit that helps to protect your young plants from unwanted external elements. It includes a vented domed and a grow tray made from heavy-duty Polypropylene plastic. It is resistant to breaks and warping thus it is suitable for reuse and can last you for years.
It’s clear vented dome enables you to control the humidity inside. At the same time, it also allows maximal sunlight to reach through your cultivars. Moreover, its high-top design gives the flourishing plants more vertical space to grow.
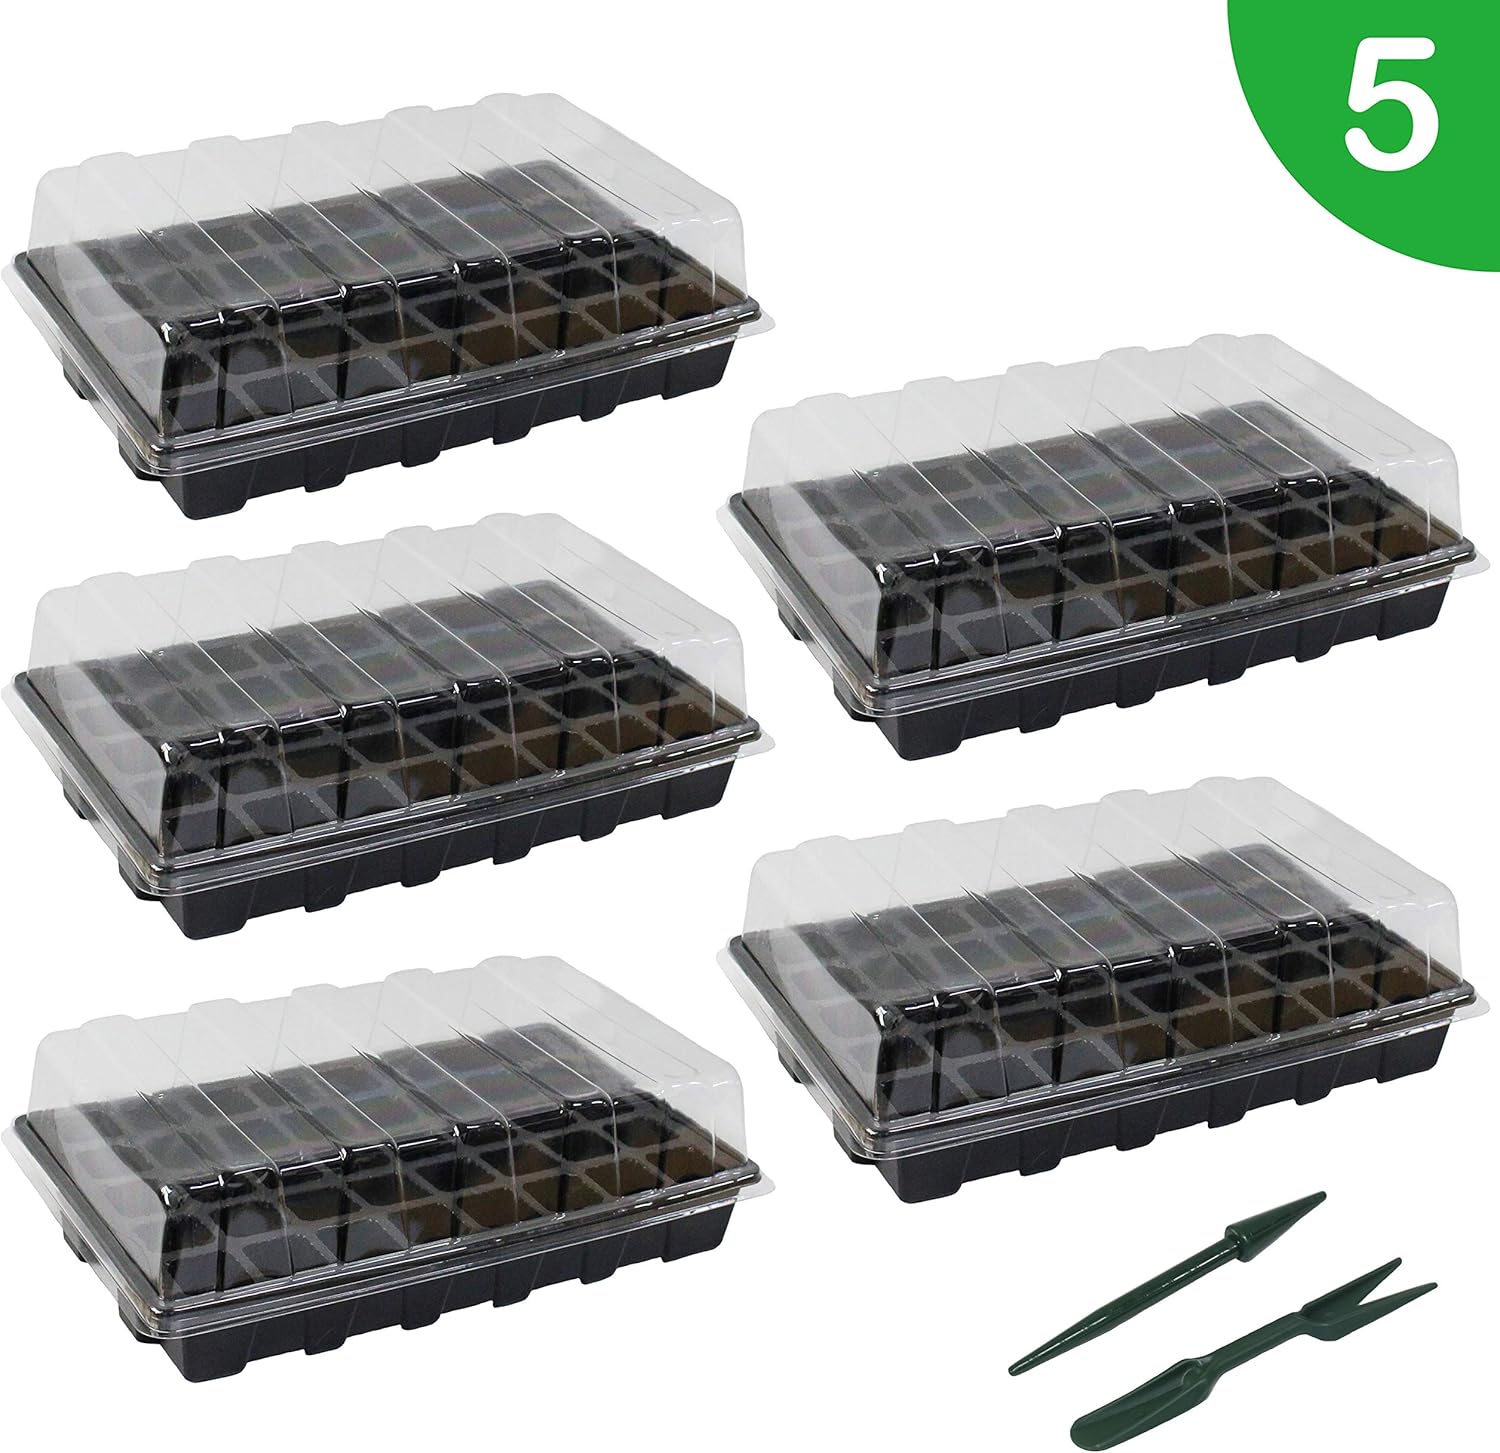
3. Best Seed Starter (Propagation) Tray Kit – Gardzen 5 Set Seed Starter Tray Kit with Dome and Base
[su_button url=”https://www.amazon.com/dp/B07R9S38VX?tag=mygardenpl-20″ target=”blank” background=”#99CC33″ size=”6″ center=”yes” icon=”icon: hand-o-right” icon_color=”#FFFFF” rel=”nofollow”]Buy This Product Here[/su_button]
This basic seed starter set consists of seed trays, base trays, and transparent domes. The seed trays come in 40 cells with drain holes on each to prevent overwatering the cultivar. A single cell has a measurement 1.4-inch in square shape. This provides ample space for cannabis seedlings to grow into.
4. Best Seed Germination Tray – Koram 10-Pack Seed Starter Trays with Lid and Base

[su_button url=”https://www.amazon.com/dp/B071CYJQYT?tag=mygardenpl-20″ target=”blank” background=”#99CC33″ size=”6″ center=”yes” icon=”icon: hand-o-right” icon_color=”#FFFFF” rel=”nofollow”]Buy This Product Here[/su_button]
The Koram seed starter kit is perfect for cannabis germination. The seed trays come in 6 cells with 1.9-diameter each. Moreover, it is being made with flexible plastic. Thus, making it easier to transfer seedlings in the future.
The kit also comes with a humidity lid dome to maintain the moisture inside. A durable base tray is also included to help drain the excess water from the seed trays. It is also compatible to use with a heat mat for added warmth.
5. Best Rooting Tray – General Hydroponics Rapid Rooter Tray
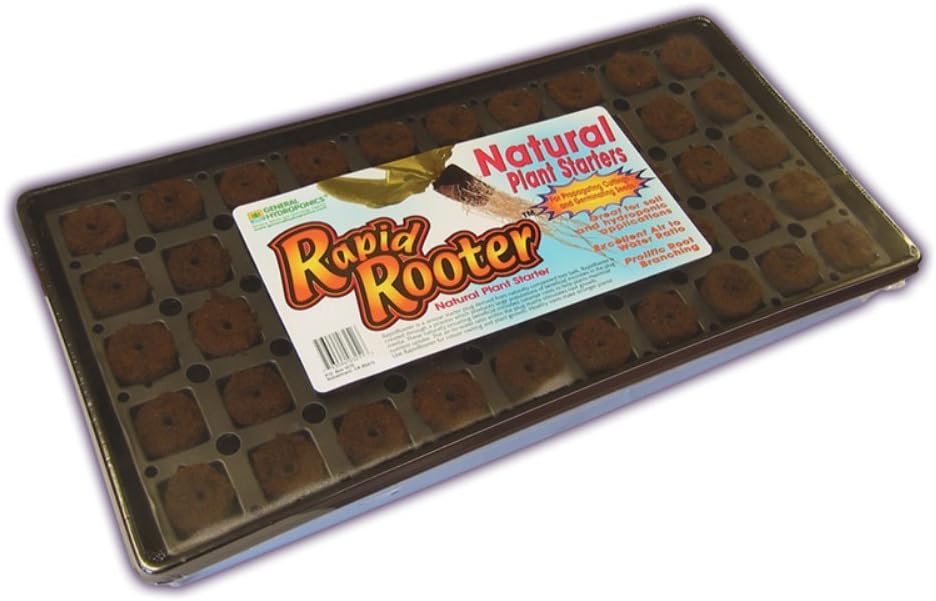
[su_button url=”https://www.amazon.com/dp/B000I63VSE?tag=mygardenpl-20″ target=”blank” background=”#99CC33″ size=”6″ center=”yes” icon=”icon: hand-o-right” icon_color=”#FFFFF” rel=”nofollow”]Buy This Product Here[/su_button]
This is a ready-to-use propagation tray complete with soil and nutrients. The tray has 50 cells, each containing a special mix of plant-based composed material. Every plug is already packed with micronutrients. Thus, promoting healthier and faster growth of your cannabis seedlings and cuttings.
6. Best Cloning Propagation System – Hydrofarm OxyClone 20 Compact Recirculating Cloning Propagation System
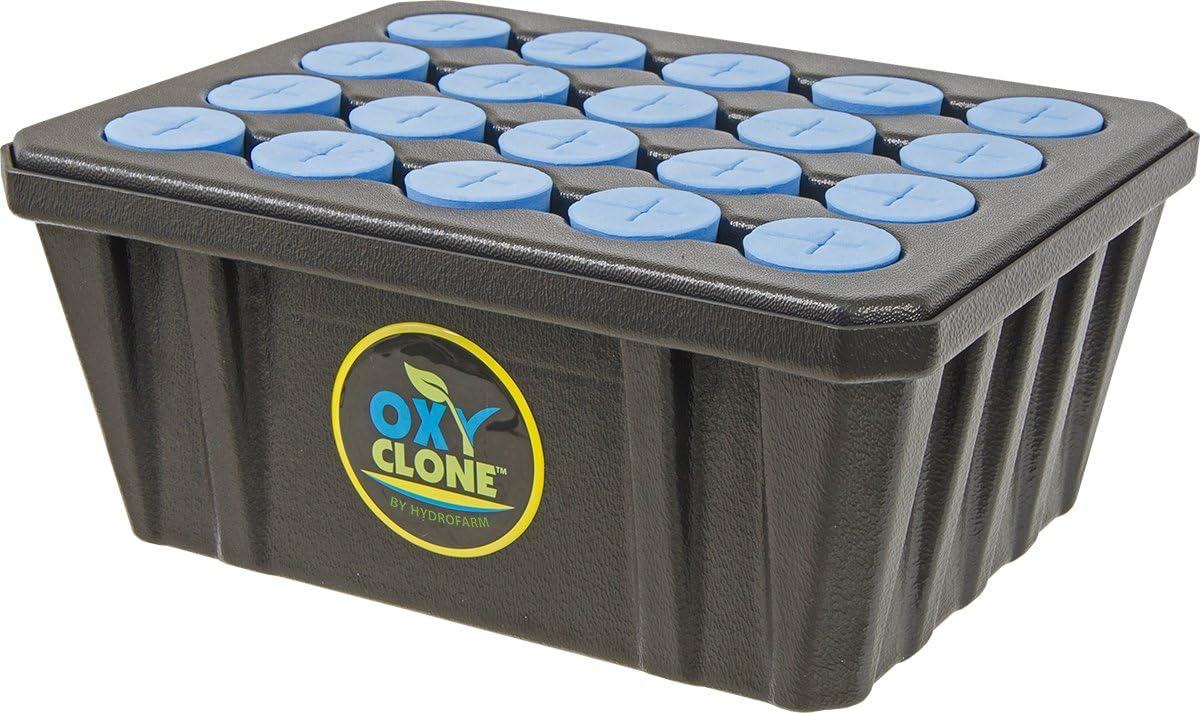
[su_button url=”https://www.amazon.com/dp/B01HGME97E?tag=mygardenpl-20″ target=”blank” background=”#99CC33″ size=”6″ center=”yes” icon=”icon: hand-o-right” icon_color=”#FFFFF” rel=”nofollow”]Buy This Product Here[/su_button]
The OxyClone 20 is a compact tabletop hydroponic cloning system. This allows growers to propagate young plants in water. It is being operated by an aqua pump that delivers a generous amount of oxygen to the plant’s root system.
It also enforces an evaporative cooling measure to keep less heat in the environment. Moreover, the plastic used in its reservoir is BPA-free. Thus, it is safe to use with edible plant seedlings.
7. Best Propagation Kit with Light – Super Sprouter Deluxe Propagation Kit
[su_button url=”https://www.amazon.com/dp/B06ZY5SWRX?tag=mygardenpl-20″ target=”blank” background=”#99CC33″ size=”6″ center=”yes” icon=”icon: hand-o-right” icon_color=”#FFFFF” rel=”nofollow”]Buy This Product Here[/su_button]
The Super Sprouter Deluxe is the same propagation kit as the premium version minus only the heat mat. Thus, it is much lesser in cost. Yet, this still includes a 7-inch clear vented dome with track light channels. Moreover, it also comes with a T5 fluorescent grow light, a perfect fit for the channeled domes.
8. Best Propagation Kit with Heater – Vivosun Heating Seed Starter Germination Kit
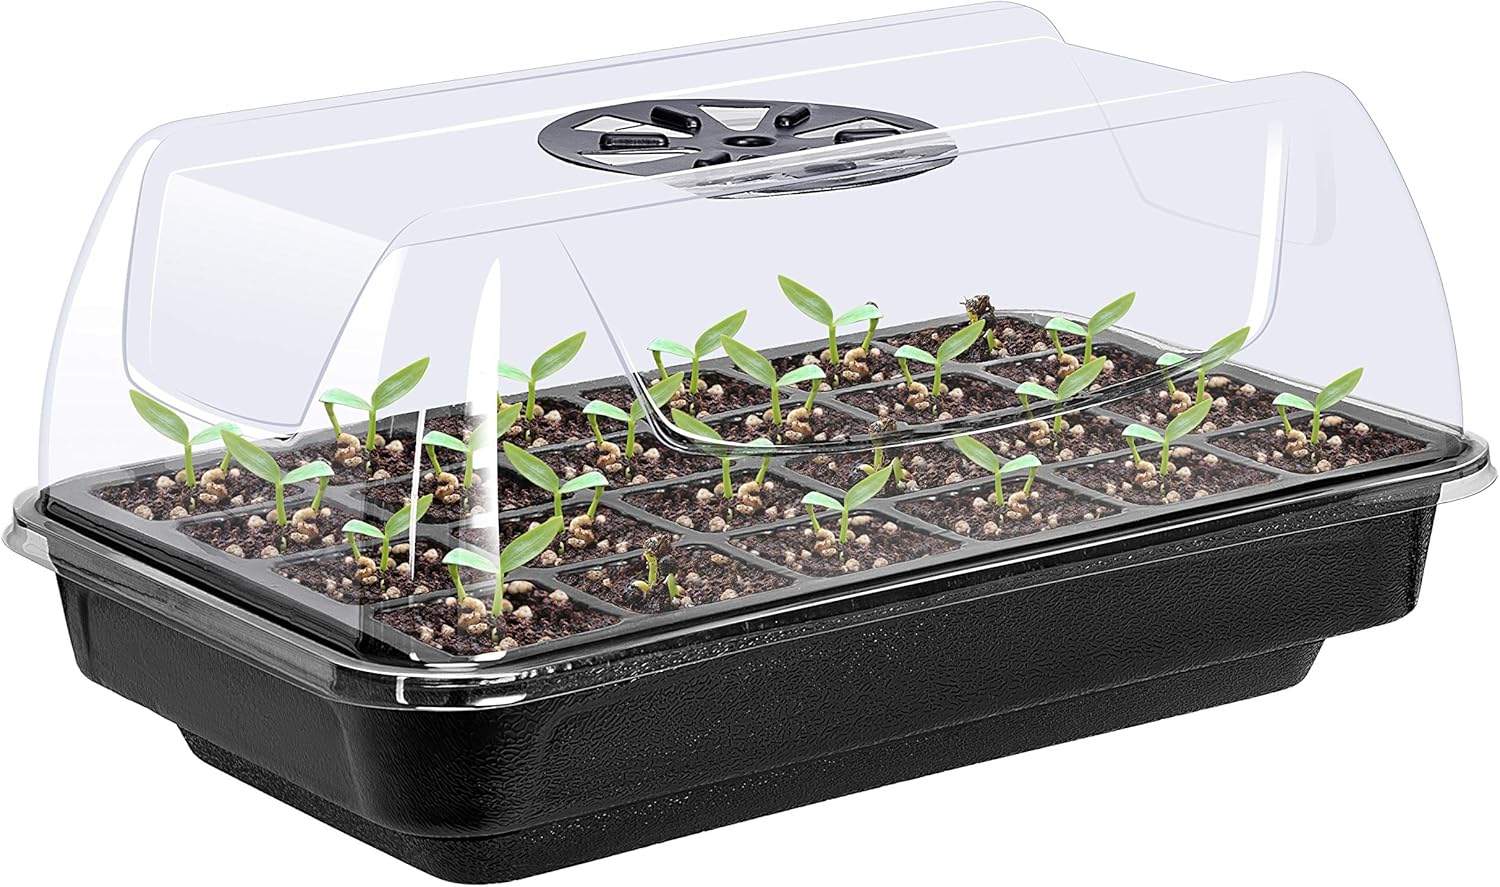
[su_button url=”https://www.amazon.com/dp/B07XNQT52F?tag=mygardenpl-20″ target=”blank” background=”#99CC33″ size=”6″ center=”yes” icon=”icon: hand-o-right” icon_color=”#FFFFF” rel=”nofollow”]Buy This Product Here[/su_button]
This propagation kit comes with a built-in heating tray. Thus, it allows the growers to have full control over the temperature of the growing area. This germination tray is being made with durable and waterproof ABS plastic. Thus, it is sure to last you for a long time.
The set also includes a clear vented dome to help maintain the humidity. A 24-cell tray insert with a 2-inch diameter per slot is being provided too. This cell size is perfect for growing cannabis seedlings or cuttings with ease.
9. Best Mini Propagation Kit – SunBlaster Mini Greenhouse Kit
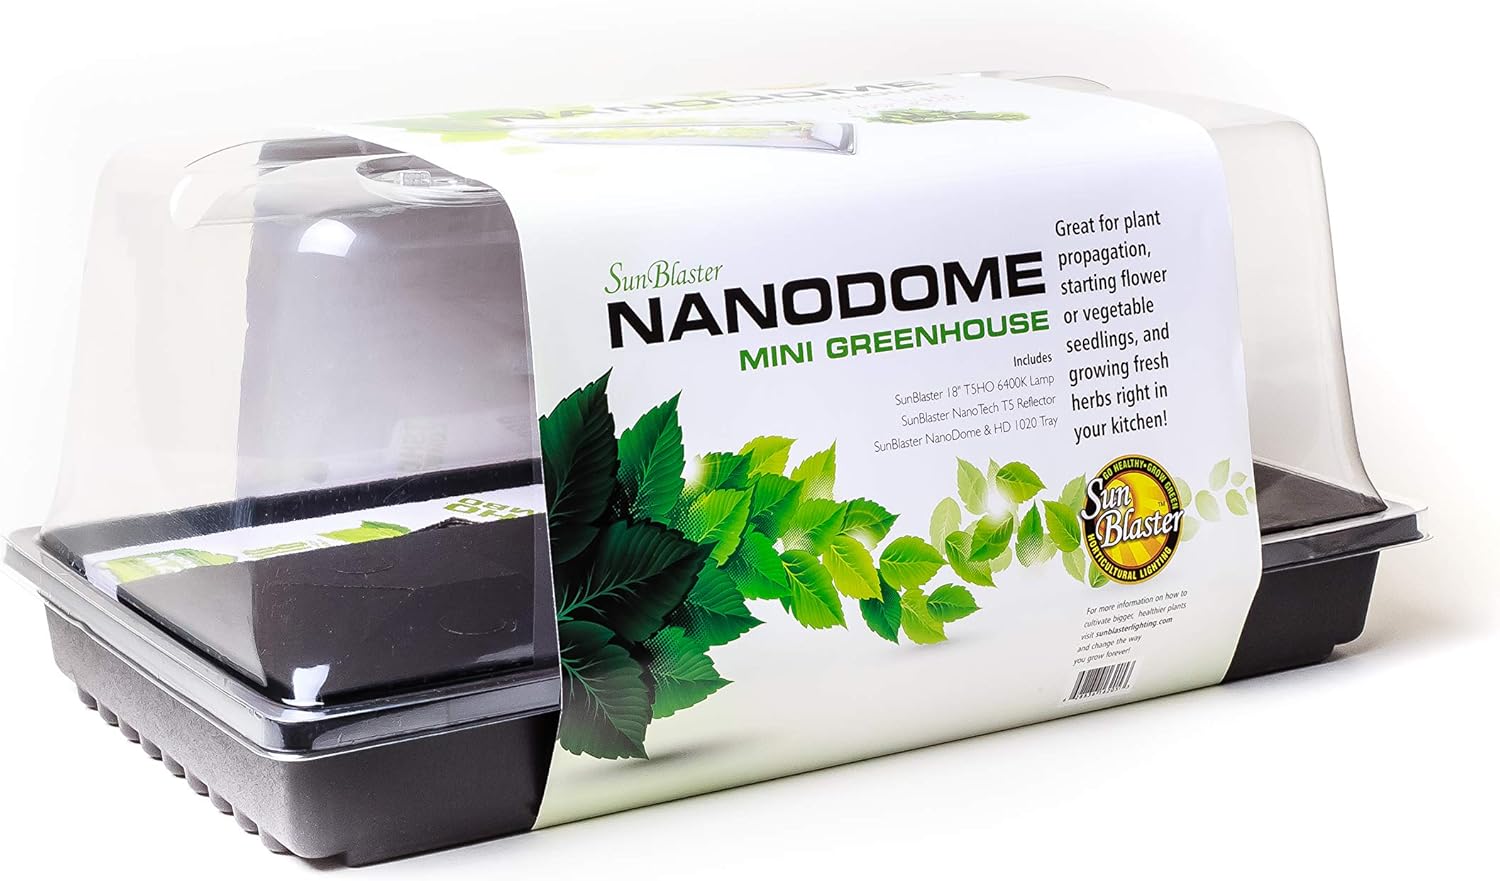
[su_button url=”https://www.amazon.com/dp/B00AKKU71M?tag=mygardenpl-20″ target=”blank” background=”#99CC33″ size=”6″ center=”yes” icon=”icon: hand-o-right” icon_color=”#FFFFF” rel=”nofollow”]Buy This Product Here[/su_button]
This mini greenhouse kit is a basic set of a grow tray, a vented dome, and grow lights. This nano dome is being made exclusive to use with the T5HO 6400K combo grow lighting kit. Moreover, it also includes a heavy-duty 1020 germination tray. The kit, though, does not include cell-trays.
10. Best Large Propagation Kit – EarlyGrow 93807 Domed Propagator with Height Extenders
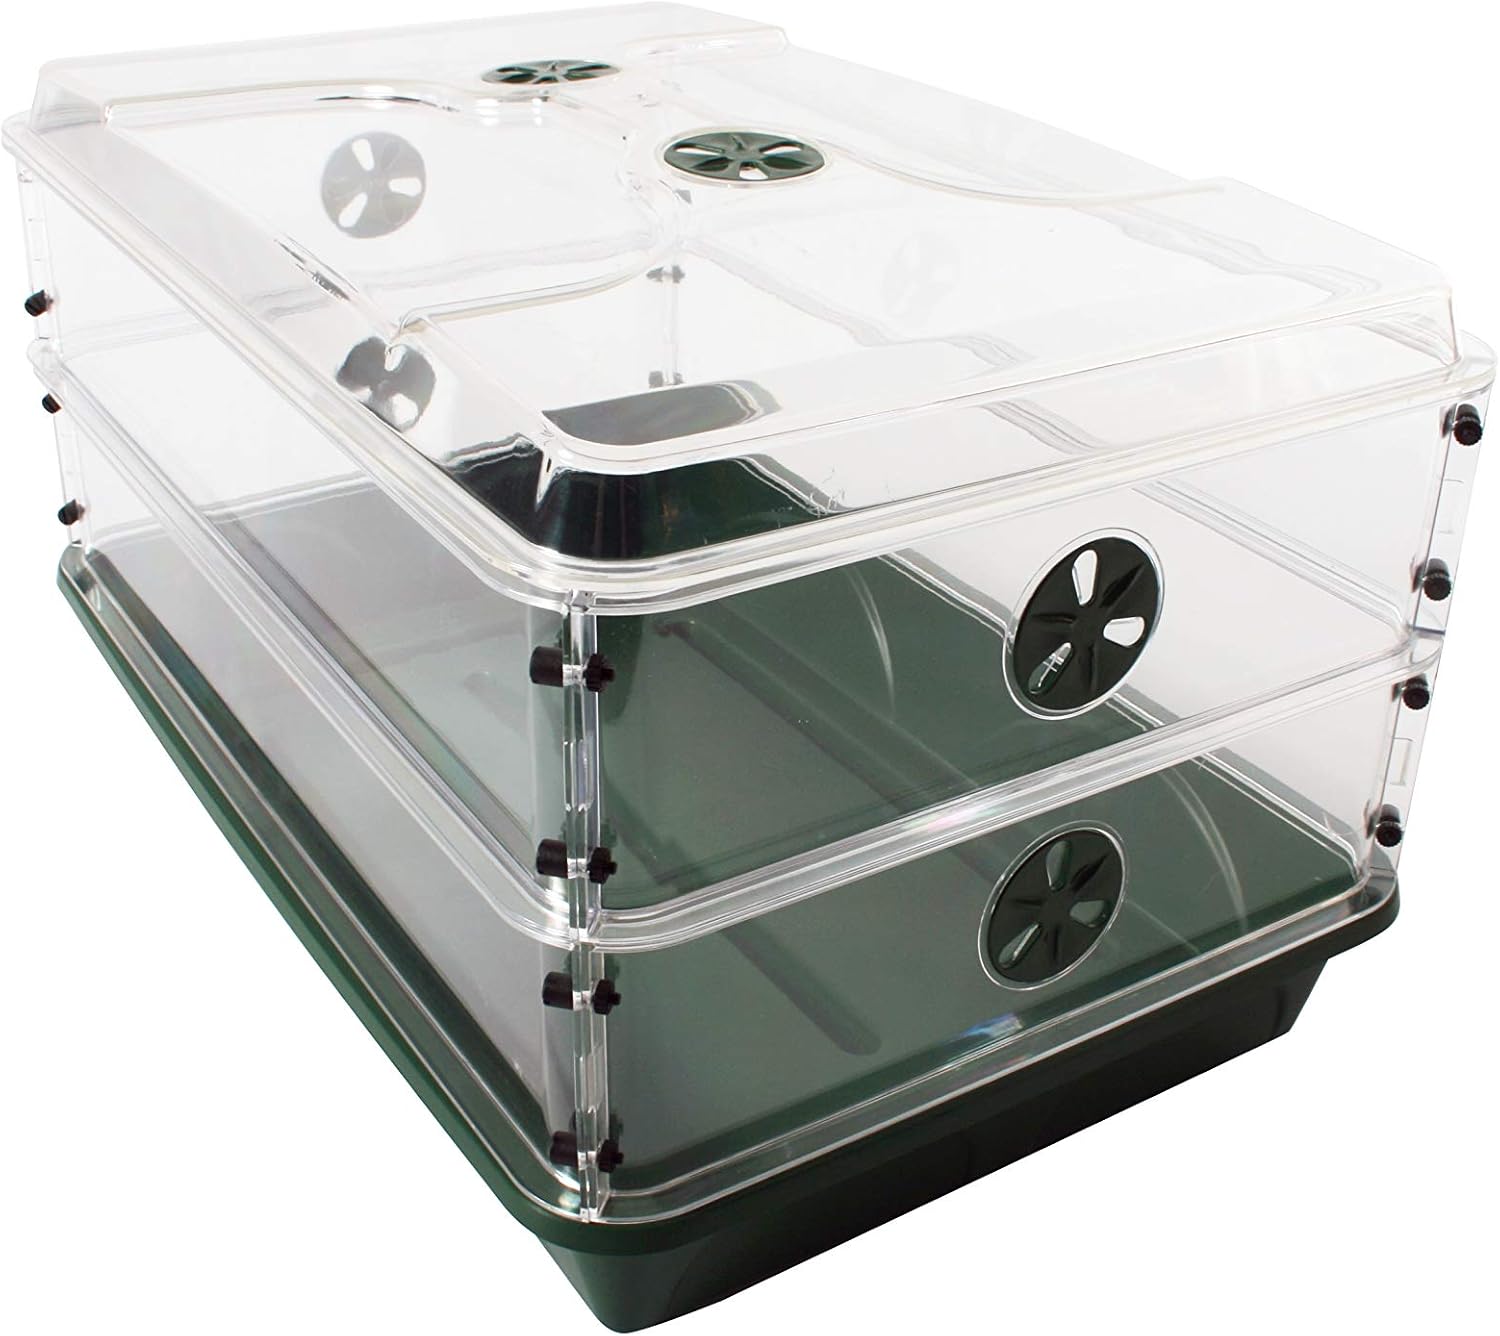
[su_button url=”https://www.amazon.com/dp/B07GRRDXSV?tag=mygardenpl-20″ target=”blank” background=”#99CC33″ size=”6″ center=”yes” icon=”icon: hand-o-right” icon_color=”#FFFFF” rel=”nofollow”]Buy This Product Here[/su_button]
This propagator kit is perfect if you wish to provide your young plants with ample space to grow. It has an extra-large grow tray that can accommodate up to 60 units of 2″x2″ seed trays. Moreover, it also includes a vented humidity dome with two height extenders. With this extension, you can add 12.75″ more to the height. Thus, giving you the flexibility to adjust the vertical space as your plants grow.
Propagation kits indeed are your best buddy for this project. They offer you the convenience of creating a conducive growing environment. Thus, it is important for you to determine the best one for your needs to ensure better chances of success.
Whether you choose to do it via seed germination or cloning, be confident that you can achieve this. Growing cannabis does need to be as complicated as it seems. As long as you make sure to equip yourself with the right knowledge, tools, and a whole lot of patience. Of course, don’t forget to also buy the correct propagation kit.
[su_youtube url=”https://www.youtube.com/watch?v=nqrD_cRAEC4″]
Final Word
Cannabis is not as difficult to grow as you might think. Well, not with the right propagation kit at least! In this article we unpacked various different ways through which you can propagate cannabis, as well as our favorite propagation kits to help you with the process. From the Super Sprouter to the Seed Started Germination Kit, you truly are spoilt for choice.
Have you tried to propagate cannabis or any type of plant? Let us know if you found this information helpful in the comment section below. Happy growing!
